PostgreSQL, while being an modern and versatile RDBMS, is not the easiest of beasts to setup and get going while you’re looking to develop an application. Read on to learn about how you can get started with the latest version of PostgreSQL on the LTS version of Ubuntu.
Installation
Ubuntu 18.04 comes with PostgreSQL 10, but we can instead use the APT repository hosted by the PostgreSQL team to install the latest version, PostgreSQL 11.
You can setup the repository using these commands:
# add the repository
sudo tee /etc/apt/sources.list.d/pgdg.list <<END
deb http://apt.postgresql.org/pub/repos/apt/ bionic-pgdg main
END

# get the signing key and import it
wget https://www.postgresql.org/media/keys/ACCC4CF8.asc
sudo apt-key add ACCC4CF8.asc

# fetch the metadata from the new repo
sudo apt-get update
And then install the software itself, using:
sudo apt-get install postgresql-11The installation does a few things:
- It installs the PostgreSQL server, utilities and a command-line client called psql.
- It creates a Linux system user called postgres. All data files are owned by this user, and all processes run as this user.
- It creates one database, also called postgres.
- It creates one PostgreSQL user (not the Linux system user), also called postgres.
You can see this is beginning to get confusing!
Database Clusters
Your newly installed PostgreSQL server consists of a set of processes that manage what is known as a “database cluster”. You can see the processes here:
alice@devbox:~$ ps axfww | grep postgres
 4737 ?        S      0:00 /usr/lib/postgresql/11/bin/postgres -D /var/lib/postgresql/11/main -c config_file=/etc/postgresql/11/main/postgresql.conf
 4749 ?        Ss     0:00  \_ postgres: 11/main: checkpointer
 4750 ?        Ss     0:00  \_ postgres: 11/main: background writer
 4751 ?        Ss     0:00  \_ postgres: 11/main: walwriter
 4752 ?        Ss     0:00  \_ postgres: 11/main: autovacuum launcher
 4753 ?        Ss     0:00  \_ postgres: 11/main: stats collector
 4754 ?        Ss     0:00  \_ postgres: 11/main: logical replication launcher
The main process (here with PID 4737) is the main process which further spawns the child processes – this is conventionally called the “postmaster” process.
PostgreSQL’s usage of the term “cluster” predates modern-day fancy distributed clustering jargon – here it just means a set of databases being managed on a single machine by a single postmaster. Read more about clusters here.
A cluster contains databases (for now we have just one, “postgres”) and PostgreSQL users (again, just one for now, also called “postgres”) among other things. Just so you know, the cluster is associated with a whole bunch of data files, all of which live under one single directory – in this case under /var/lib/postgresql/11/main. Did you notice this path in the postmaster command line above?
When your app, or psql, connects to Postgres, it has to do so in the context of a PostgreSQL user. There is always a PostgreSQL user associated with a connection. But, as you might have guessed by now, a PostgreSQL user may or may not correspond to a system user.
System Users and PostgreSQL Users
PostgreSQL users can be created using SQL commands like CREATE ROLE or bundled tools like createdb.
When any application tries to connect to Postgres, it needs to supply a PostgreSQL user name. Let’s see what happens when you launch a PostgreSQL client like psql:
alice@devbox:~$ psql
psql: FATAL:  role "alice" does not exist
Here, “alice” is your Linux system user name. psql takes this name and uses it as the Postgres user name. A role (roles are a sort generic name for “user” or “group”, BTW) by that name does not exist, which is what Postgres is complaining about.
We know that there is a role by the name “postgres”, so let’s try that. We can use the “-U” parameter of psql for specifying the username:
alice@devbox:~$ psql -U postgres
psql: FATAL:  Peer authentication failed for user "postgres"
OK, we’re getting closer – the role/user “postgres” exists, but “peer authentication” has failed. What is this “peer authentication”?
Peer and Password Authentication
PostgreSQL clients like psql or your app can connect to the PostgreSQL server over one of these IPC mechanisms:
- Unix domain sockets
- TCP sockets
Unlike TCP sockets, Unix domain sockets offer the possibility of validating the client connection’s system user id. The Postgres server can examine an incoming connection over a Unix domain socket and determine the client’s system user ID and then decide whether to grant it access or not.
By default, your sever only listens for connections over unix domain sockets and not TCP/IP.
Let’s see what happens if we try to start psql as the system user postgres:
alice@devbox:~$ sudo -u postgres psql
psql (11.0 (Ubuntu 11.0-1.pgdg18.04+2))
Type "help" for help.

postgres=#
That worked! (Use “\q”, “\quit” or ^D to exit psql, BTW.)
In peer authentication, if the client connection is made using a Unix domain socket and the client process has the same system user name as the PostgreSQL user it is trying to connect as, then the authentication is considered successful.
PostgreSQL users also can be optionally assigned a password, and you can ask PostgreSQL to validate incoming connections using the password. But how? That is the next piece of the puzzle.
pg_hba.conf
It’s now time to open the (in)famous pg_hba.conf configuration file, located at
/etc/postgresql/11/main/pg_hba.conf:
sudo vim /etc/postgresql/11/main/pg_hba.confHBA stands for host-based authentication. Basically, this file is used to control how PostgreSQL users are authenticated. This file is probably the most non-intutive part of the PostgreSQL learning curve. The reference documentation is here, you should read it later.
The first (non-comment) line here is:
local all postgres peerwhich tells Postgres to accept “local” (unix domain) connections to “all” databases, authenticating as user “postgres” using “peer” authentication. This is why connecting as the system user “postgres” works out of the box.
The order of lines in this file are important, the first matching line wins. Let’s see another line:
host all all 127.0.0.1/32 md5This line allows “all” users to login using TCP/IP (“host”) from the localhost (“127.0.0.1/32”) to “all” databases, if they succeed in password authentication using the “md5” method.
There are more password authentication methods (md5, scram-sha-256, gss, ldap, …) than we can cover, so let’s just get back to simpler examples.
But first, we need to make sure PostgreSQL is accepting TCP/IP connections also. For that, we need to edit the main configuration file.
postgresql.conf
The file /etc/postgresql/11/main/postgresql.conf is the main configuration file for your PostgreSQL cluster. This file contains a lot of settings, and understanding what all of those mean is no easy task at all. For now, let’s see the very first setting:
#listen_addresses = 'localhost'This line is commented by default, let’s uncomment it to make it read:
listen_addresses = 'localhost'This will let PostgreSQL listen for incoming TCP/IP connections on localhost, port 5432 (the default). Save the changes (you’ll have to be “root” to do this), and restart the Postgres server for the changes to take effect:
sudo systemctl restart postgresql(Note that some for most settings changes you just have to “reload”, not “restart”, but this requires a “restart”).
Now we can see Postgres listening on port 5432, bound to 127.0.0.1:
alice@devbox:~$ sudo netstat -tnlp | grep 5432
tcp        0      0 127.0.0.1:5432          0.0.0.0:*               LISTEN      8408/postgres
Now let’s setup a new user and database for use by an app.
App Setup
Let’s connect as the superuser “postgres” to make the changes:
alice@devbox:~$ sudo -u postgres psql
psql (11.0 (Ubuntu 11.0-1.pgdg18.04+2))
Type "help" for help.

postgres=# create user myapp_user password 's3cr3t';
CREATE ROLE
postgres=# create database myapp owner myapp_user;
CREATE DATABASE
postgres=#
We have now created a database called myapp and a user called myapp_user,
with the password s3cr3t. The database is empty, and will be owned by the user
myapp_user, which means that by connecting as myapp_user the client will be
able to do execute most all DDL/DML commands.
Let’s connect to the app database as this app user now:
alice@devbox:~$ psql -h 127.0.0.1 -d myapp -U myapp_user
Password for user myapp_user:
psql (11.0 (Ubuntu 11.0-1.pgdg18.04+2))
SSL connection (protocol: TLSv1.2, cipher: ECDHE-RSA-AES256-GCM-SHA384, bits: 256, compression: off)
Type "help" for help.

myapp=>
It worked! You’re now connected to “myapp” (see the prompt), using SSL over a TCP/IP connection to 127.0.0.1. Note that we specified the database name also on the command-line for psql. For historical reasons, if this is omitted, the database name is also assumed to be the same as the system user name (“alice” here), which is not what we want. The PostgreSQL user name is also specified (“-U myapp_user”).
If you need to connect from other machines, you’ll need to edit pg_hba.conf
to add lines like so:
# existing entry, allows connections from localhost
host all   all        127.0.0.1/32 md5

# new entry to allow connections from 10.1.2.0/24 subnet,
# only to myapp database for myapp_user
host myapp myapp_user 10.1.2.0/24  md5
and reload PostgreSQL (“sudo systemctl reload postgresql”) for changes to take effect.
With this in place, you can now use database connection strings like these in your apps:
# URL format
postgresql://myapp_user:s3cr3t@127.0.0.1/myapp

# connection string format
host=127.0.0.1 user=myapp_user dbname=myapp password=s3cr3t
Ready!
This should get you setup with a dedicated database and user for your app. Your app development framework (like Django, Drupal etc.) should be capable of creating objects (like tables, views) and managing the data in this database.
About pgDash
The latest versions of pgDash and pgmetrics already support PostgreSQL 11.
pgDash is a modern, in-depth monitoring solution designed specifically for PostgreSQL deployments. pgDash shows you information and metrics about every aspect of your PostgreSQL database server, collected using the open-source tool pgmetrics. pgDash provides core reporting and visualization functionality, including collecting and displaying PostgreSQL information and providing time-series graphs, detailed reports, alerting, teams and more.
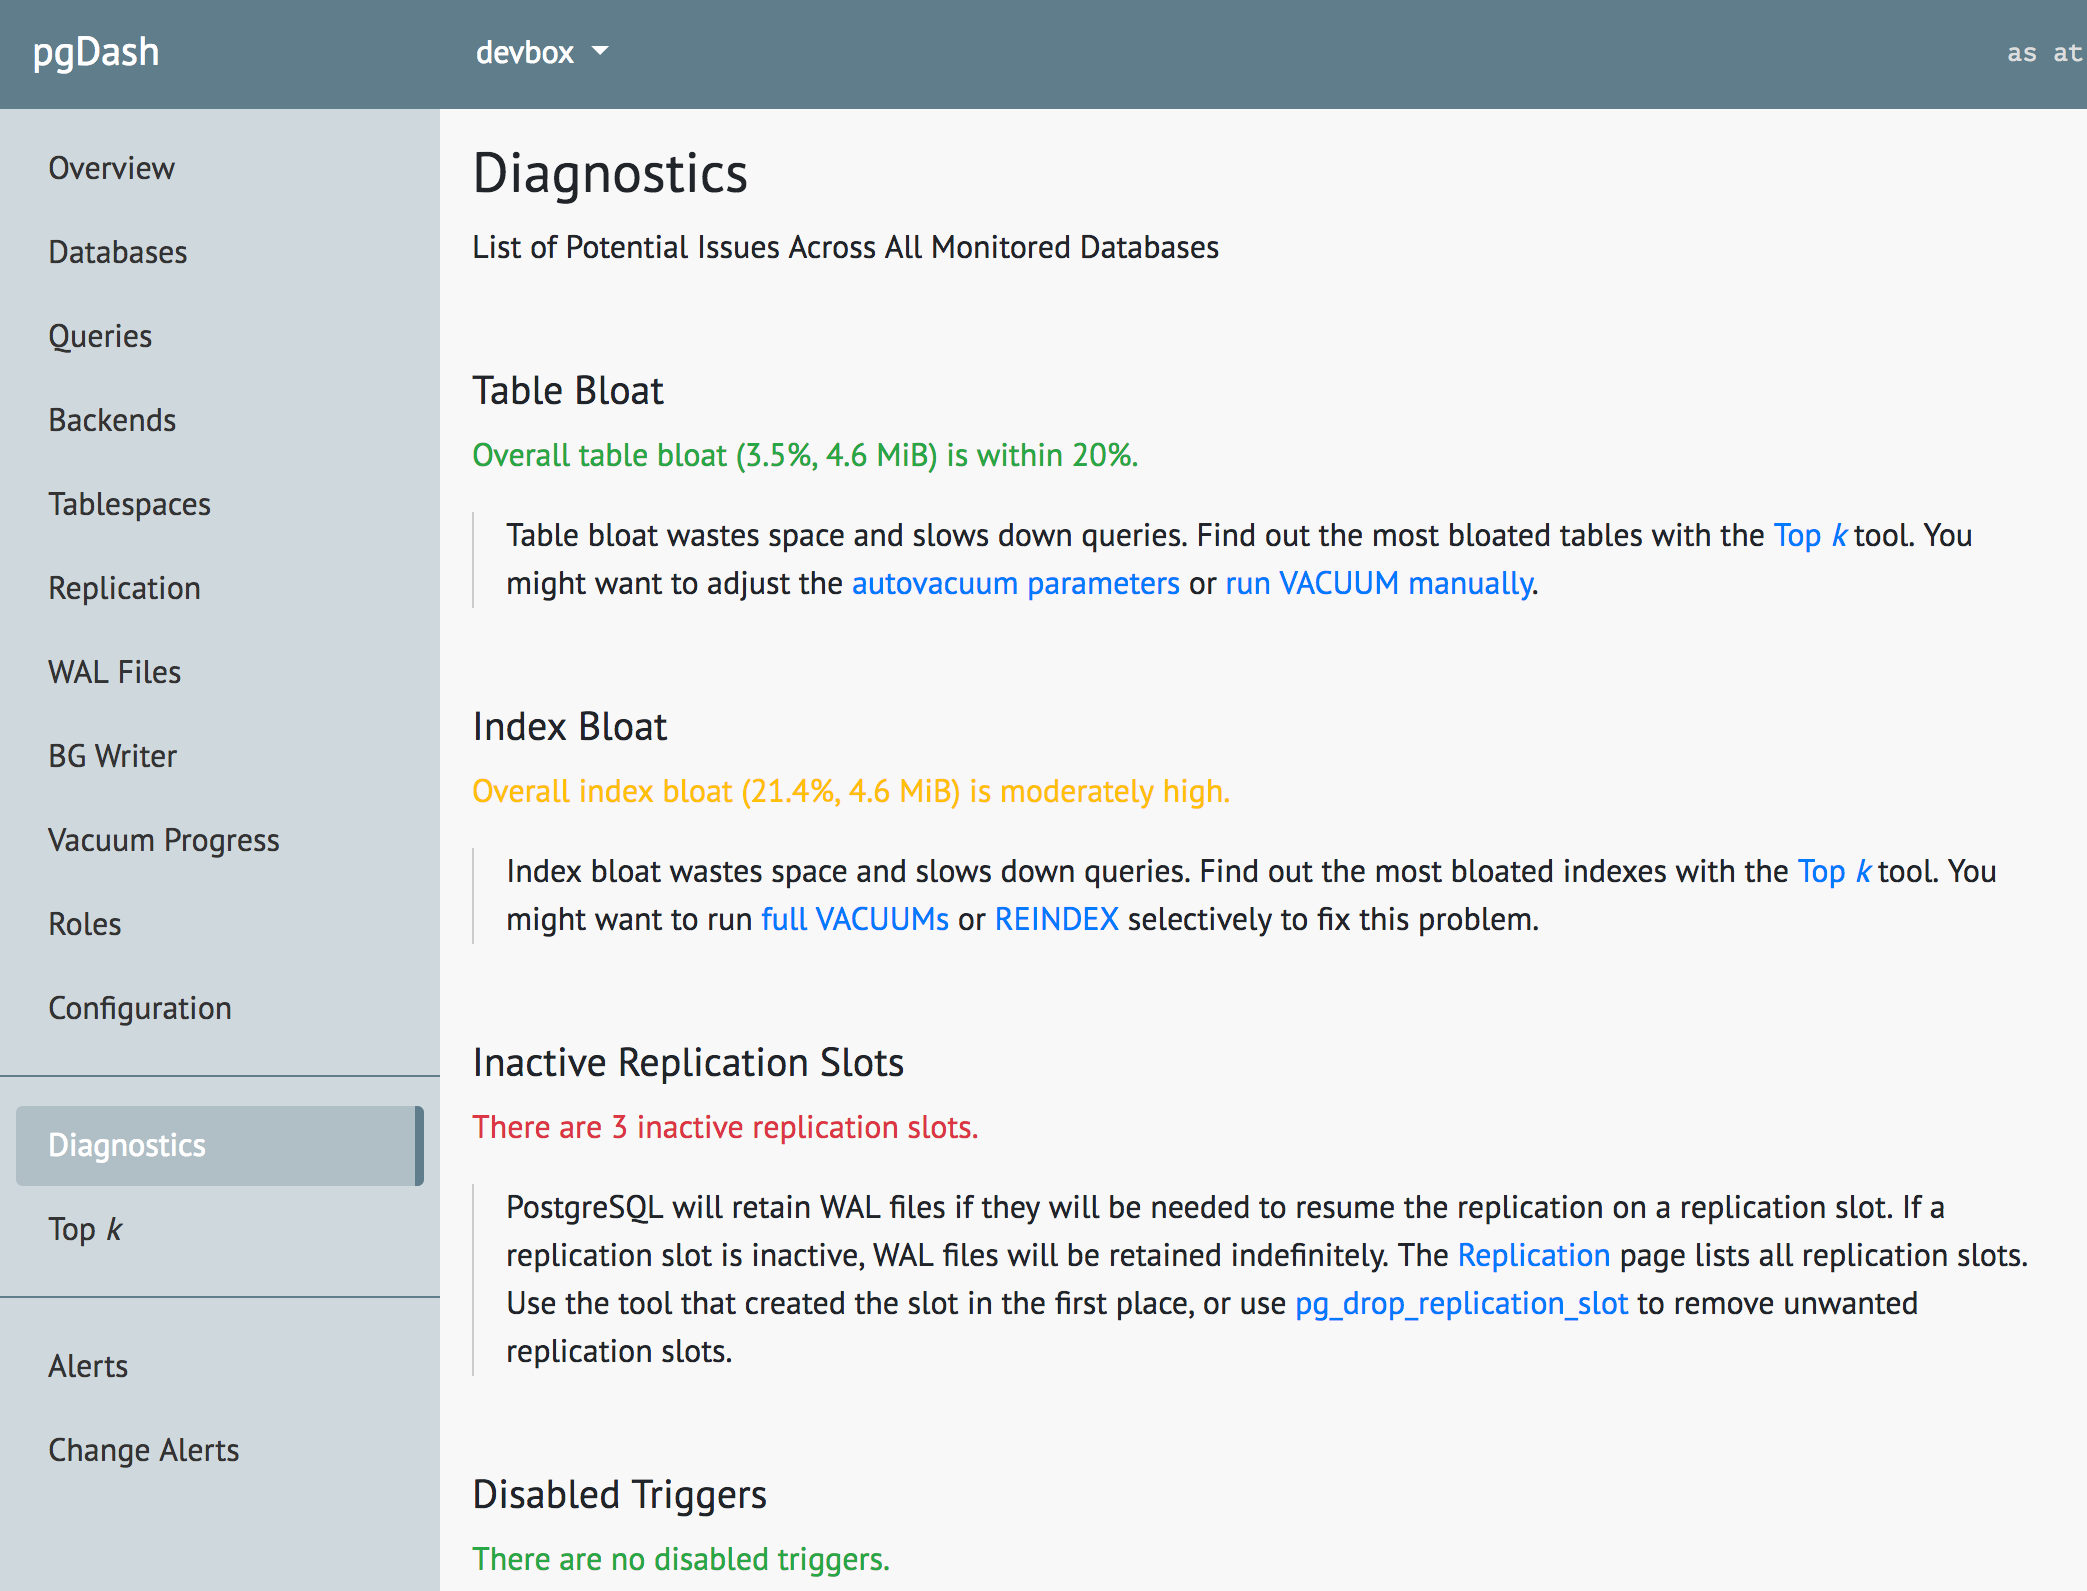
The Diagnostics feature in pgDash examines your PostgreSQL server and databases scanning for potential issues that can impact the health and performance of the deployment. No additional setup is required for Diagnostics - you just need to be actively sending in data to pgDash. Learn more here or signup today for a free trial.